Sears Custom 10XL Project

<<< Previous Page

Next Page >>>

Page 6

       At this point I decided to take a break from the transmission and move toward the frame again. I started gathering up the needed hardware for the frame as well as inspecting other parts for repair.

       One of the fenders had some serious rust damage most likely caused by capillary action (being bolted close to the frame). I wanted to save the fender so I devised a way to patch the weak spots.

       First I cleaned off both sides of the damaged area to get a better look at what needed to be repaired.

       Next I made a 16 gauge sheet metal plate that fit the concave shape of the fender on the inside as seen below.

       To attach the metal I used my spot welder to evenly secure the patch to the fender. This will keep it from peeling out if the fender is flexed.

       I then welded a few spots on the patch to strengthen the fender where it mounts to the frame/chassis.

       The exposed side of the fender is mostly hidden by the chassis however I will patch the exposed rust damage with body filler later in the build.

       The fenders are really solid and straight now....

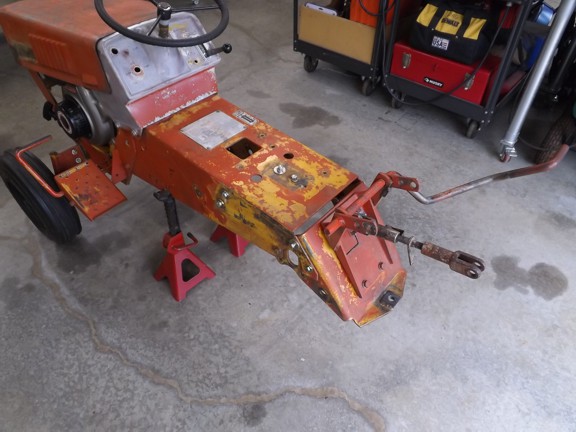
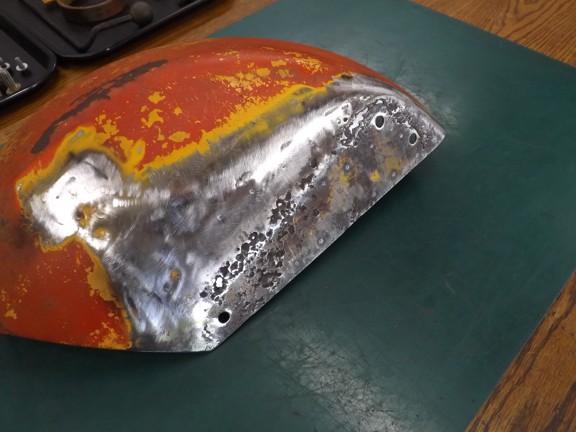
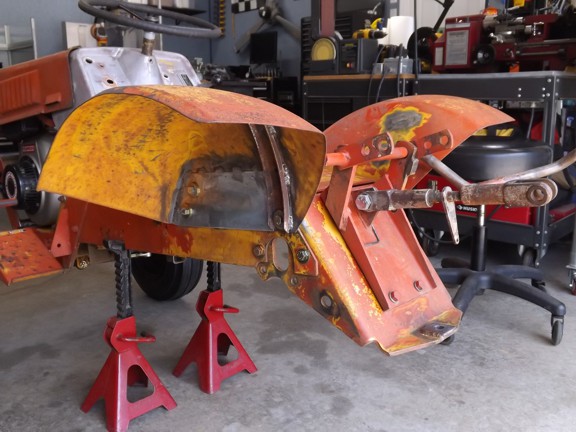
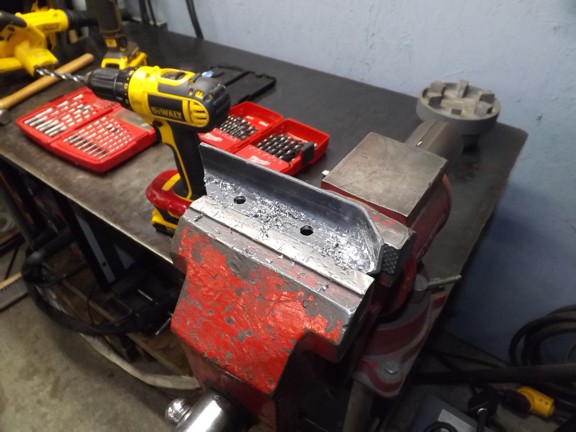
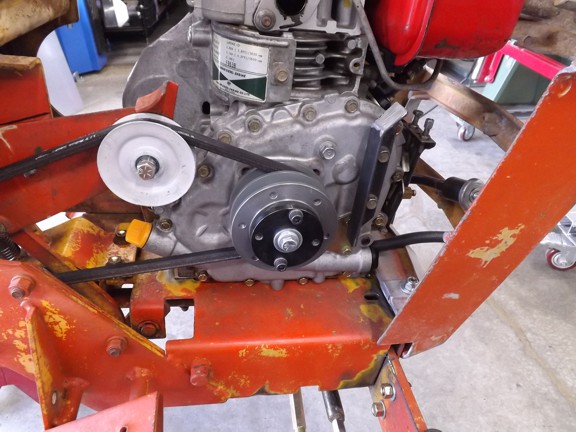
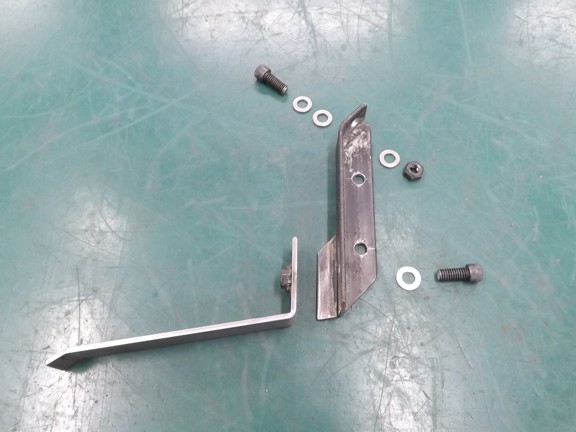
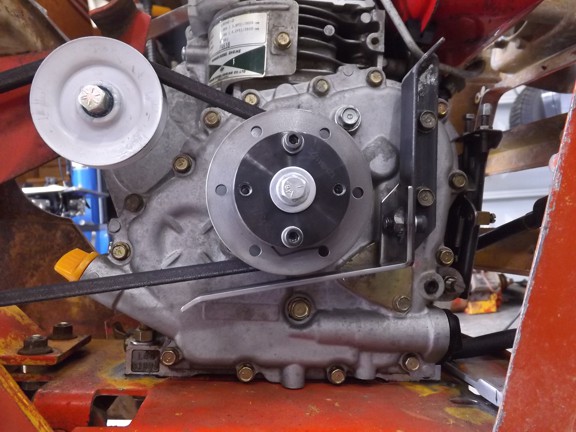
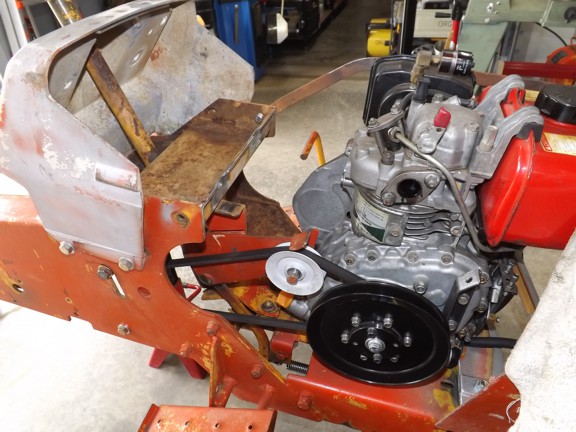
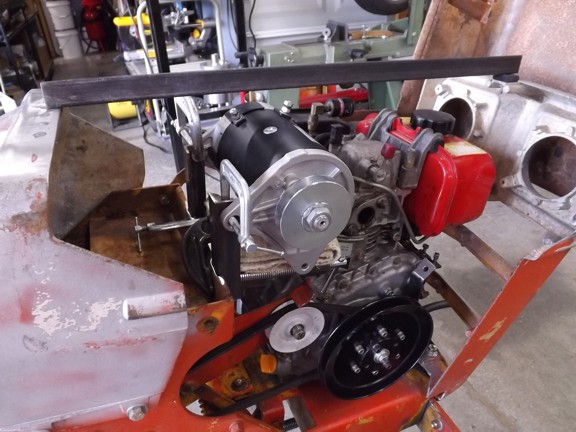
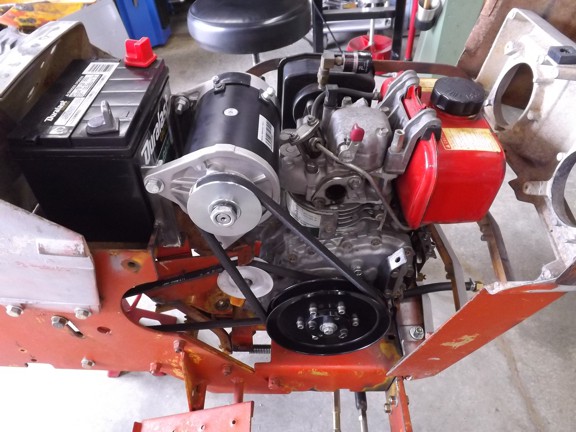
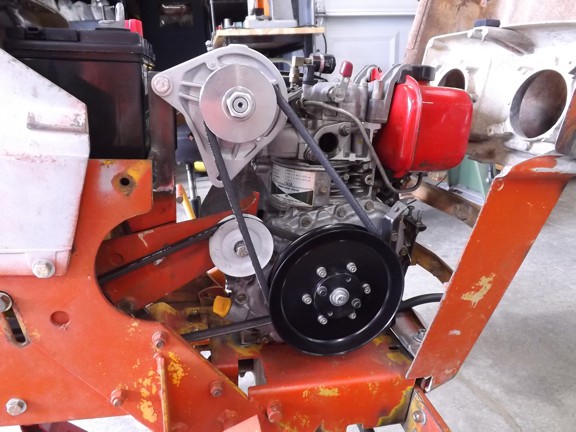
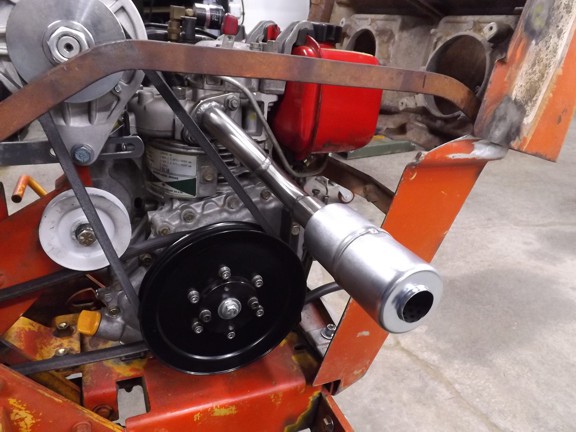
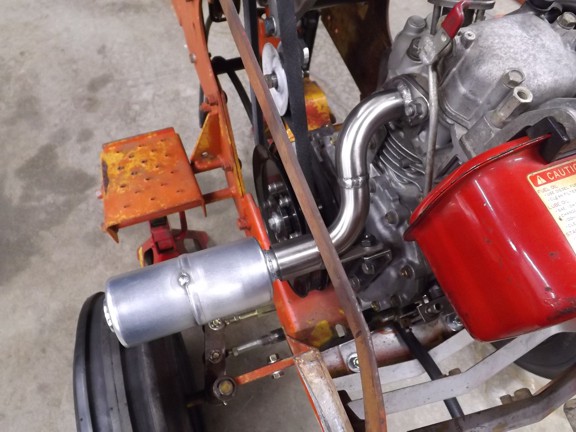
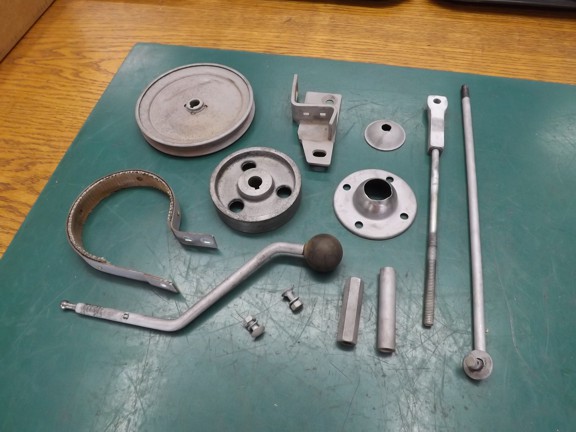
       At this point I temporarily mounted the transmission back into the chassis for mockup (waiting on some new seals) so I could work out the engine pulley geometry and belt length. I needed to make the “belt rest” that will hold the slack belt when the belt tensioner is disengaged (seen below).
       Note: this style of drive train uses belt tension to act as a clutch to disengage the engine from the transmission. When engaged, a belt tensioner pulls the belt tight against the engine pulley and when disengaged it allows slack to let the pulley slip over the pulley.

       The belt rest bracket will also support the exhaust pipe which is coming later. You can see the tensioner pulley below (in white)...

       I designed the belt rest (bottom left) to be removable with one bolt so the belt can be changed more easily later on.

       When the belt goes slack it should lay on the rest and friction will stop it from moving. Unfortunately I did not take a photo of this which would of demonstrated this process so well :o/

       I reinstalled the 7” pulley back onto the cast pulley in preparation for setting up the starter generator.

       Most if not all lawn tractors have an electric start just like a full size tractor. This one won’t be any different however the engine I have does not have a starter or an alternator. To fix this problem I am adding a starter generator ($130) that is traditionally used on two stroke golf carts. This type of starter can start the engine and then charge the battery when the engine is up to speed. The best part is that it is smoother, quieter and more reliable than a Bendix style gear starter which has more moving parts.

       I made a bracket and tensioning bar attached to the battery tray to support the starter as seen below...

       Next I wanted to finish up the exhaust pipe for the engine of which I used some 304 stainless 1” sanitary pipe fittings as seen below.

       Being accustomed to working with 304 made the task of welding the exhaust pipe straight forward. I used some shielding gas to back-purge the pipe to avoid oxidizing of the weld on the inside of the seams.

       The new stainless pipe will prevent corrosion which is a big problem for outdoor equipment that gets hot.

       A quick test fit to mount the support tab that will mount to the belt rest bracket I made earlier.

       you can barely see the tab at the bottom of the lower elbow...

       And now back to the transmission. I ordered a complete set of National brand seals to replace the input shaft, brake drum shaft, both axles and high-low selector shaft seals...

       You can see the high-low shaft seal below (left). It’s super thin.

       The next step was to make a new gasket for the case of which was made from 1/32” rubberized gasket material as seen below. Trace and cut...

       I cut an new gear selector gasket as well. A hole punch tool is very helpful to make nice round holes where needed.

       I was ready to prep for a new coat of paint on the case. A little blue tape over the seals and off to the yard for a coat of enamel.

       I’m a big fan of satin black spray paint of which I keep stock of all the time...

       Next I used my bead blasting cabinet to prep the transmission parts (not shown). A good sandblasted finish really holds onto paint which prevents rust.

       A few coats of black enamel on the parts and the transmission was ready for assembly!

<<< Previous Page

Next Page >>>

[Home] [What's New At RCDON] [Articles] [Aircraft Projects] [Aircraft Videos] [Aircraft Videos II] [Experimental Projects] [Experimental Projects II] [Nixie Tube Clock Project] [6CI Steam Engine Project] [Vertical Boiler Project] [The Toolroom Tune-Up Project] [The Reverse Tumbler Project] [Red Wing Engine Project] [MakerGear M2 Project] [The LED Studio Light Project] [Sears Custom 10XL Project] [My Collection] [RC Links] [About Myself] [Contact RCDON]