|
|
|
|
|
Posted on January 15, 2012
Hello again folks!! It has been a while since I have had a chance to get into the workshop and build something. I have been so busy with work and the family that I havent even had a chance to fly my model airplanes! Luckily things have lightened up at work and I have had the luxury of taking some time off for a family vacation. Of course my vacation included a couple of extra days for me to have some much needed garage time ;0)
After taking a wonderful vacation with my wife and kids we settled back into home life for the post-vacation vacation. Now having several free days to play I weighed in all of the projects that I would of like to get into. Of course the most ambitious project was the most intriguing to me which would involve quite a bit of work.
The project I had in mind was to remodel the north side of my workshop to accommodate a new mill and lathe I had received earlier as a Christmas present from my wife (yeah, I guess I have to admit I am one lucky dude!!!). I have always wanted a larger mill and lathe to tackle bigger projects and the recent overtime I had worked put us in the position to acquire them. Unfortunately my garage is fairly small and would require me to move everything on the north wall to accommodate my new machines.
|
|
|
 |
|
|
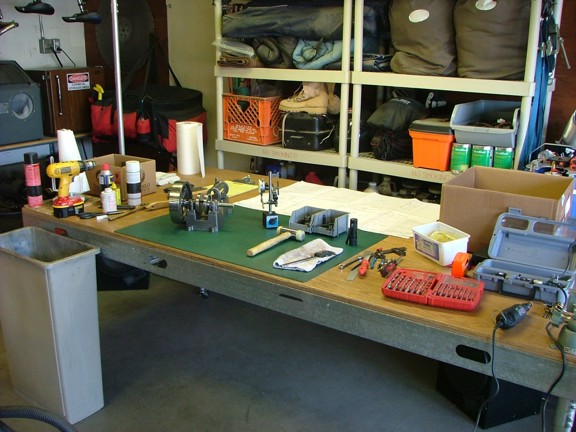
For years now I have been trying to work in a two-car garage which at one point had a full size lifted truck parked in it most of the time! After the years moved on the truck was relocated into the back yard to make room for my ever growing collection of tools and projects. To complicate matters I have so much stuff stored in the garage that I have to move most of it to the driveway whenever I want to build something on the shop floor!
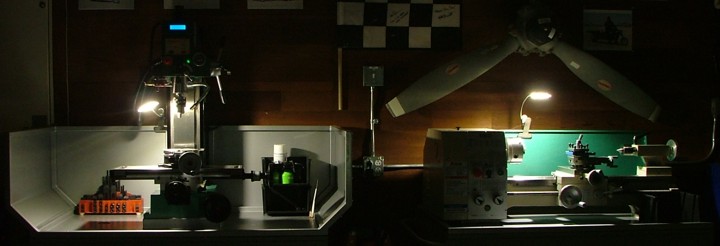
To help make room for the new machines I devoted a day to relocating my wall shelving into my backyard storage shed and then organizing all of my camping stuff and fuels into the tiny 7 x 7 shed (not shown). This was quite a bit of work but freed up some valuable real estate. After I cleared up the wall I installed a set of work lights and some dedicated outlets for my new machines (seen below).
I also decorated the wall with a few jet bike photos and mementos from the Mad Scientists TV show.
|
|
|
 |
|
|
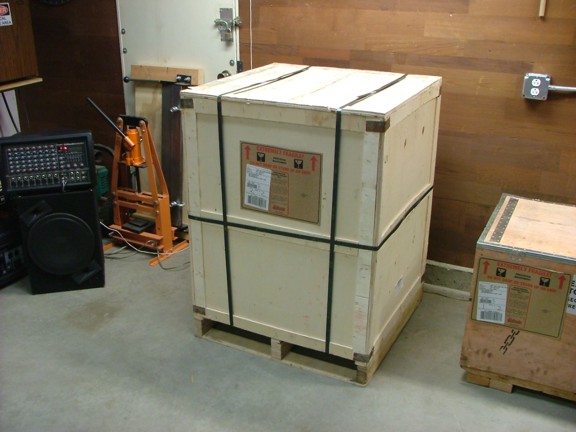
I had received my new machines from Grizzly Industrial just a couple of days after I had prepared the wall space. I had chosen to pick up the machines from the FedEx depot in leu of having them delivered as to save money on a lift-gate fee. I picked up both machines with my truck and then removed them using my 880 pound electric hoist and some lifting straps (not shown).
|
|
|
 |
|
|
I cant tell you how excited I was to see my new machines!!!
|
|
|
 |
|
|
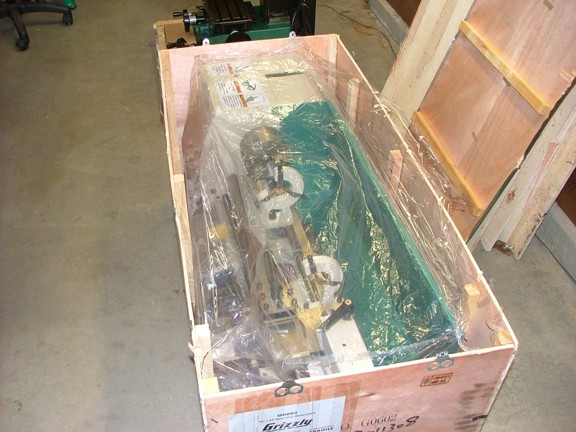
The crating job was well done as both machines were received in excellent condition.
|
|
|
 |
|
|
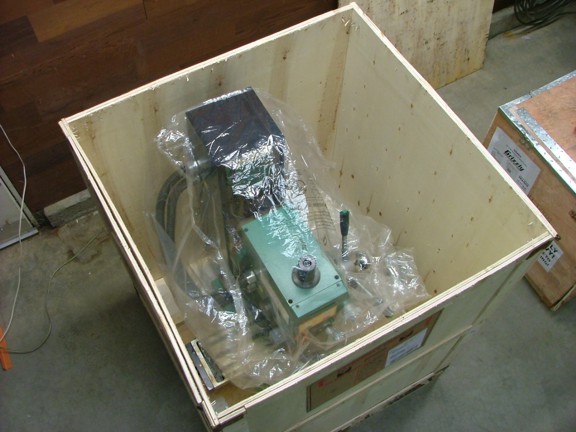
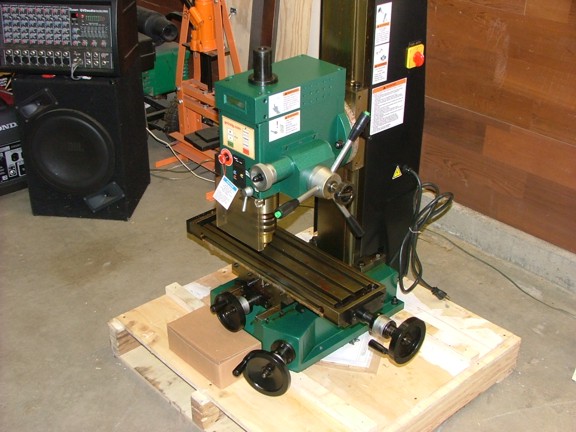
I inspected my new Grizzly G0619 - 6 x 21 deluxe mill/drill which was covered with a gooey anti-rust grease. The 364 pound machine was in pristine condition considering it had been in a sea container on the ocean for two weeks....
|
|
|
 |
|
|
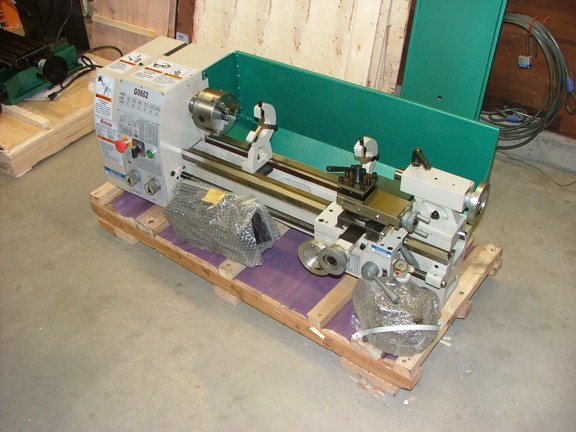
The next to unpack was my Grizzly G0602 - 10 x 22 bench lathe. This 330 pound machine also arrived in great condition.
|
|
|
 |
|
|
The lathe came with a 6 four-jaw chuck, 8 faceplate, 3-dead centers and a toolbox full of tools, change gears and fasteners....
|
|
|
 |
|
|
I had been shopping for new equipment for a few months before deciding on these two machines. I had read the reviews and weighed the cost before committing to these units. For a while I had considered buying a hobby CNC machine to learn the process but the initial cost of the machine was much more than both of these units combined. I decided instead to buy a decent lathe and mill with the option to later upgrade the mill to CNC control.
The Grizzly G0619 mill is a good unit to upgrade to CNC (Computer Numerical Control) as there are a couple kits on the market and ready to bolt on. However, these kits are pricey and when all is said and done will cost as much as the mill itself (not including a computer or CAD/CAM software). This is an investment that I am just not ready to make right now.
I want to learn more about manual machine work before I venture into the world of CNC (but still want to have the option later on). These two machines will be perfect in helping me learn more about machining while allowing me to tackle the larger projects my micro machines cant.
|
|
|
 |
|
|
I didnt order these machines with stands as I wanted to custom build benches with integral chip pans and coolant drains. These features will help keep the workshop floor much cleaner. I also wanted to make the workbenches as economical as possible to save money for my future CNC upgrade. To do this I decided to build my benches out of wood with an 18 gauge steel top which will serve as a chip tray and coolant catch. This design will be far cheaper than an all steel design and much lighter too.
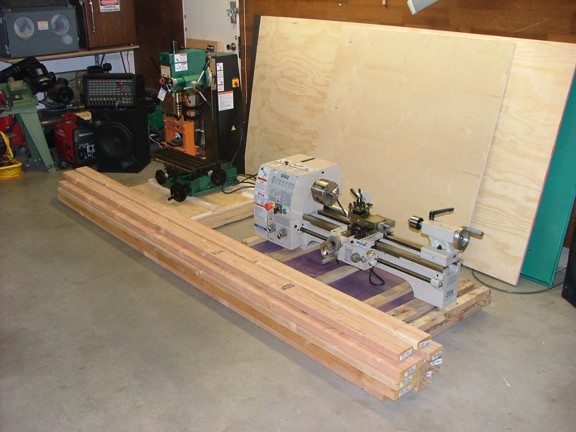
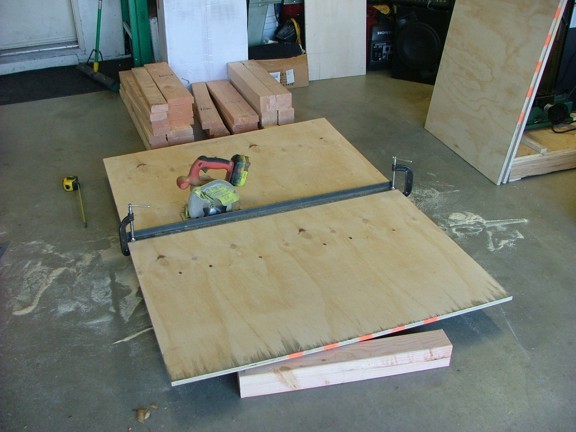
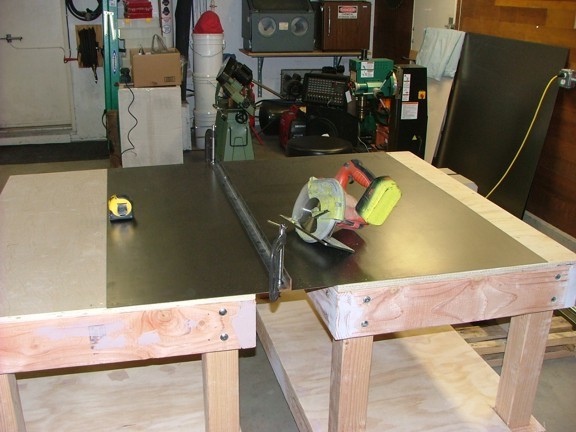
To get started I purchased some 23/32 birch plywood as well as 2x4, 2x6 and 4x4 wood to build the benches. I spent about $225 in wood and hardware (including the caster wheels for both benches). Notice the use of the angle iron straight edge below. This is how I get straight cuts in large sheets without the use of a table saw. I just run the circular saw against the fence and I get perfect cuts every time....
|
|
|
 |
|
|
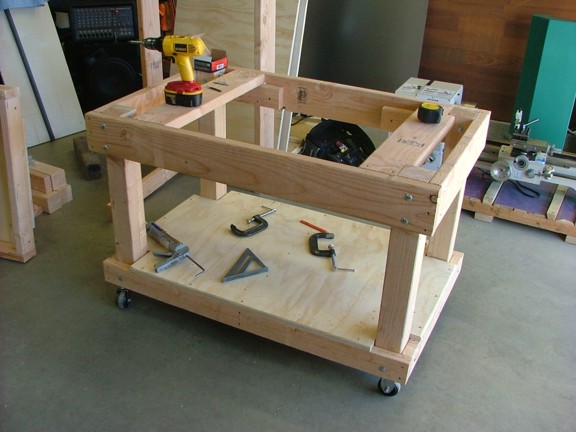
I decided to build my benches 48 wide by 30 deep and 32 tall. This will put the table of the mill and the spindle of the lathe at about elbow height (while standing). After cutting out both table top pieces and shelf pieces of plywood I was able to build the top and bottom frames for the benches. I used 3 deck screws and Liquid Nails to hold the shapes together.
|
|
|
 |
|
|
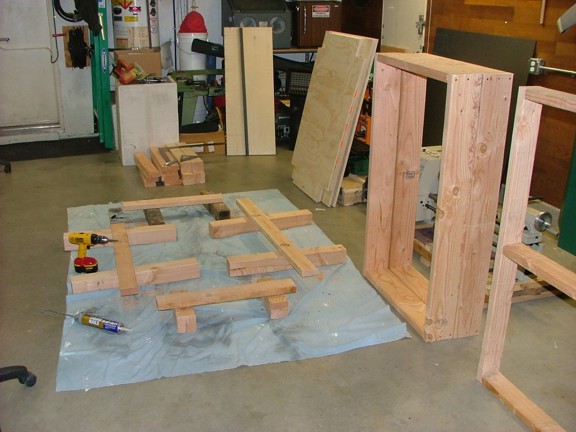
Once the frames were checked for squareness I was able to install the vertical 4x4 pieces with 6 x 3/8-16 carriage bolts as seen below. I assembled the legs using both the carriage bolts and the Liquid Nails for extra rigidity. I was sure to check all of the angles before allowing the glue to cure overnight.
|
|
|
 |
|
|
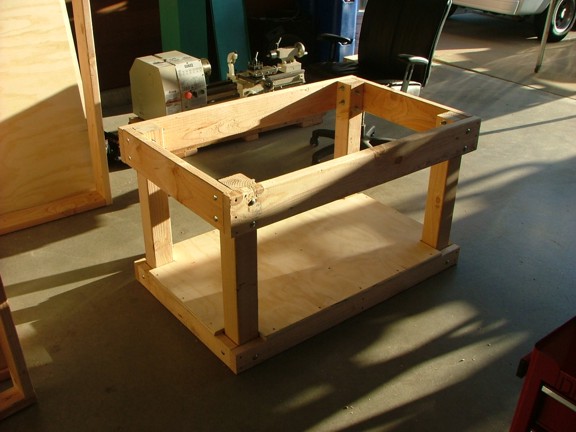
I purchased some 3 rubber coated cast iron wheels for the bench from Harbor Freight. These wheels are rated for 275 pounds each but will only be loaded to about 150 pounds.
|
|
|
 |
|
|
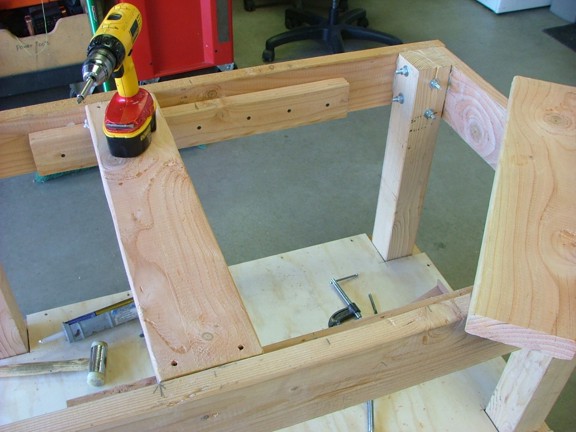
To help support the machines I used some 2x6 pieces laid sideways on a set of 2x4 ledgers inside the frame rails. The bench below is for the lathe and the beams are centered on the supports of the machine that will rest on them.
|
|
|
 |
|
|
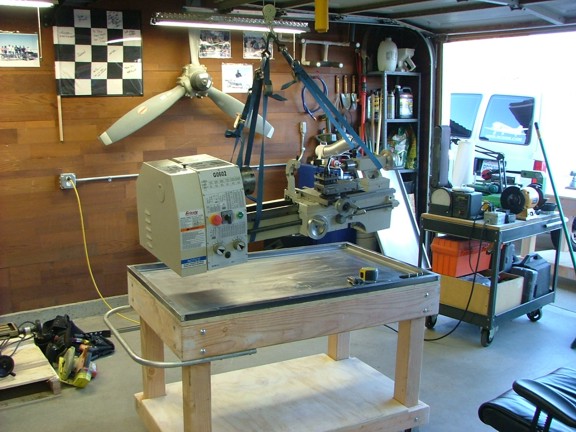
Below I am working on the support beams for the milling machine. I was careful to install these as flush with the frame rails as possible to prevent any unevenness when the machine is in place. Once all of the rails were fitted I was able to screw on the plywood tops (not shown). Since these benches are on wheels I will have to use screw jacks to level the benches/machines once they are in place on the wall. However I may forgo leveling these machines as I do not use level as a means of setup.
I setup all of my machining operations to the table which is the one and only reference to square or parallel (to the travel of the table). I have had no problems working with my little machines and they are really out of level so I doubt I will mess with this setup right now.
|
|
|
 |
|
|
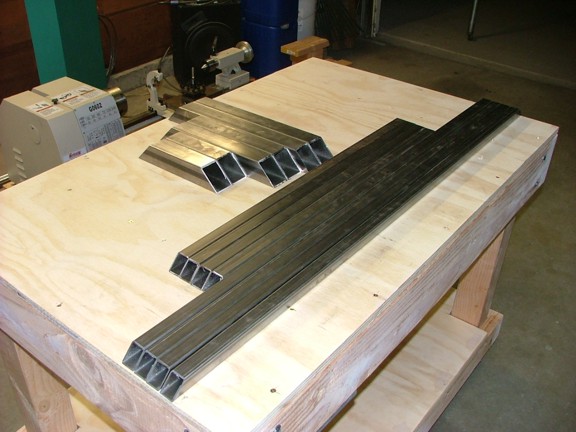
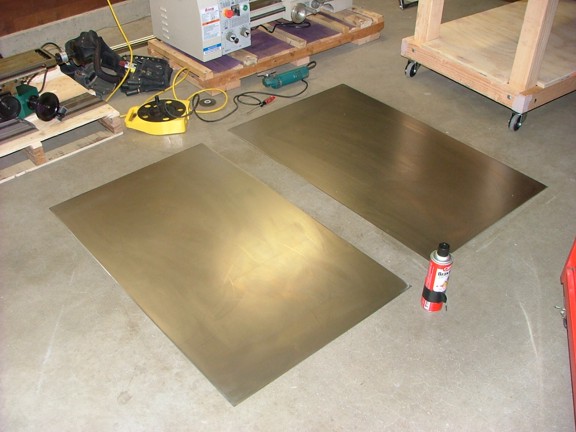
Earlier in the project I had bought three 4 x 4 sheets of hot rolled 18 gauge steel and 40 of .060 x 1 square tube. I also picked up 6 of .090 x 1.75 square tube to be used as a pedestal for the milling machine. I spent about $120 bucks on the steel....
|
|
|
 |
|
|
Using my band saw I cut out the various pieces for the chip trays and pedestal as seen below...
|
|
|
 |
|
|
Using my straight edge method I cut out two 48 x 30 chip pans from two of the 18 gauge sheets.
|
|
|
 |
|
|
I cleaned up the oil on the sheets with acetone based (non-chlorinated) Brakleen in preparation for welding. This will remove the surface oil off of the sheets which will promote a better weld.
Note: Certain types of chlorinated brake cleaning solvent (Tetrachloroethylene 127-18-4) can be chemically changed when subjected to excessive heat (welding). This chemical change can result in hydrogen chloride and possibly Phosgene gas which is seriously deadly!!!
If you should have one of these old cans of chlorinated brake cleaner I would strongly suggest that you properly dispose of the chemical to eliminate any possible health risks. Better to be safe than sorry!!!!!!
|
|
|
 |
|
|
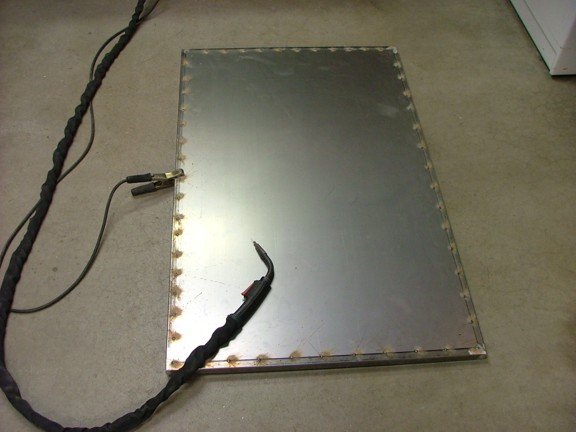
I had made a set of 48 x 30 frames to hold the chip pans in place out of the 1 square tubing I cut earlier (not shown). I then spot welded the sheets to the frames as seen below. I chose not to weld the entire seam of the trays to the frames to prevent warping of the sheet metal. This will keep the pans as flat as possible insuring better drainage. I will end up using a filler material to seal up the edges of the trays later on.
|
|
|
 |
|
|
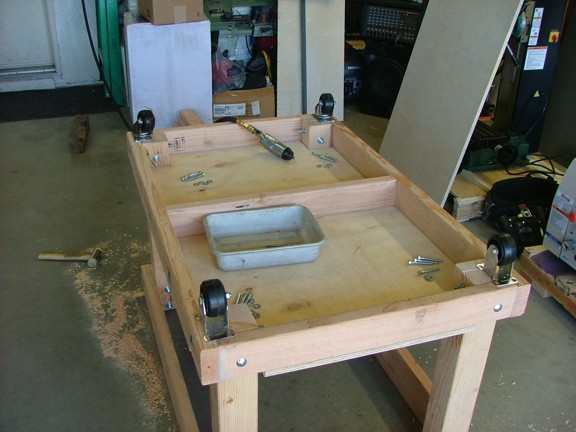
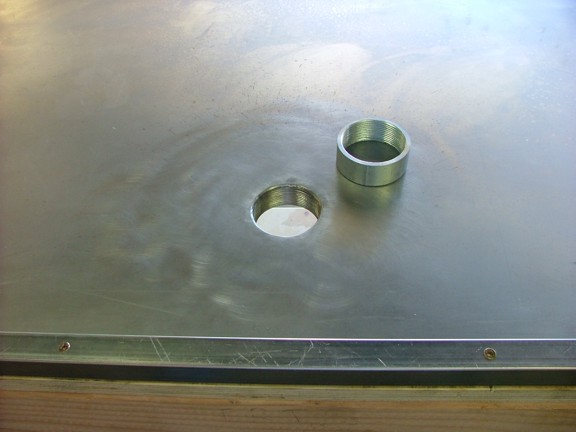
I needed to install a drain system into the chip pans so I welded a 2 steel rigid conduit coupling (halved) to the pans as seen below. I will be able to screw a drain fitting into these couplings later on.
|
|
|
 |
|
|
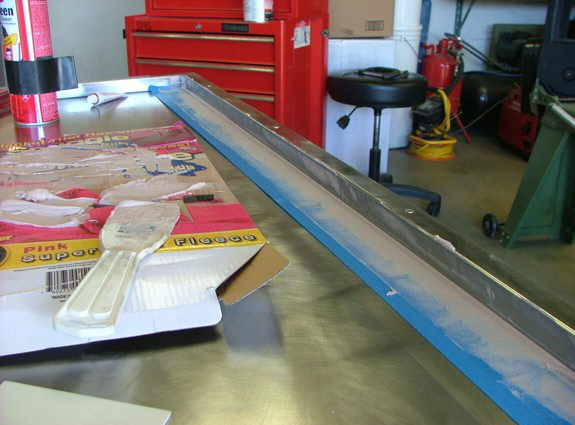
To seal the outer edge of the drain/chip pans I decided to use some Bondo body filler which really sticks well to the bare steel. I used some blue painters tape and a plastic putty knife to lay down a fillet of Bondo into the outer seam. Once the fillet was made I removed the tape leaving the permanent seal intact.
|
|
|
 |
|
|
I competed sealing the lathe bench in preparation for laying out the mounting holes of the machine. You may have noticed that I secured the chip pan to the bench using some screws that go through the outer square tubing frame. I used 12 - 2.5 long drywall screws for this purpose...
|
|
|
 |
|
|
I was now able to hoist up the lathe and fit check the bench. I was very careful maneuvering the lathe as to not get under the machine with my hands or body.
|
|
|
 |
|
|
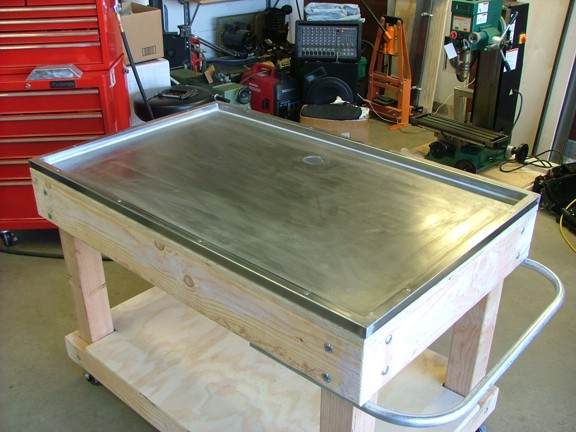
Once the lathe was positioned on the bench I secured it with two 6 x 1/2 bolts and square washers (not shown). I rolled the bench into its position along the wall for a fit check and was super happy with the current progress :0)
|
|
|
 |
|
|
Next Page >>>
|
|